With Valentine's Day coming up next week, I thought I would share this quick and easy craft inspired by this pin that I have had saved and finally got around to trying.
The recipe was easy, but it was definitely a little time consuming, mostly because you are trying to wrangle your (insert appropriate noun here: infant, toddler, etc.) child into putting their palm flat and still so that you can get the best imprint. Here is a picture of my little, so excited to make her first handprint art!
After following the recipe listed above in the pin, we transferred the dough onto aluminum foil in preparation for cooking in the oven. Then after numerous times of trying to get her to keep her hand still, we finally got it ready to go!
We originally were going to paint just the hand part, but in the end decided to do the whole thing in red. On the back we wrote her name and date with a quick "I Love You" and gave them to the grandparents as gifts.
The Verdict: Easy recipe which allowed for us to make more in case there wasn't enough to cover her hand; easily moldable which allowed for multiple re-tries; baked well and came out with a clean, overall look. I would definitely recommend trying this one at home with your little ones :)
Showing posts with label inspiration. Show all posts
Monday, February 6, 2017
Friday, January 29, 2016
Crockpot Buffalo Chicken
Recently my family's budget has gotten a bit out of control, so in an attempt to bring it back to earth, I have started making a dinner schedule. I know most people probably have one of these, but I am just now joining that bandwagon.
I thought about having a meal schedule for breakfast, lunch, and dinner but realized that we don't all leave for work/school at the same time and the same goes for the lunch hour. So everyone pretty much fends for themselves for those two meals and I come up with the dinner ideas. We have been doing it for about a month and a half, and so far it has saved us time, money, and energy.
One of the dinners I did recently came from Pinterest (where else?) and was super delicious and easy. It was this recipe for Crockpot Buffalo Chicken. It was really simple and was a total hit with my family. Here was the picture from the original post:
![]() |
| Yummy right? |
![]() |
| Just beginning |
![]() |
| A few hours in |
Spray-painted Acorns
Awhile back I was trolling one of my friend's blogs and she put up a post on creative ideas for Autumn decorating and this one caught my eye. It is her Mercury-Glass Acorns and they were so cute and easy to do, that I just had to try them!
Every year my husband's family goes apple picking and when we went this past year (I keep forgetting it's 2016!), I went with a purpose: I was going to get me some authentic acorns right from the source! I sort of stuck to that idea... I actually picked most of them off the ground, but they were in excellent condition and I managed to get a whole paper bag's worth :) When I got home, I had to sort out the good from the bad (cracked, holes, etc.) and then decide how many I was going to want to have. I settled on spray-painting some and leaving the natural color on others; I also used two colors of silver: a shiny one and a regular matte gray color. Here's how they turned out:
In the end, I used both in small glass vases with tea lights and placed them around the house for ambiance. Thanks for the idea Justine :)Monday, August 24, 2015
Rice Krispie Treats
Happy Monday! I don't usually put posts up regarding food but I found this recipe in a magazine and thought I would give it a shot. Here is a picture of the recipe:
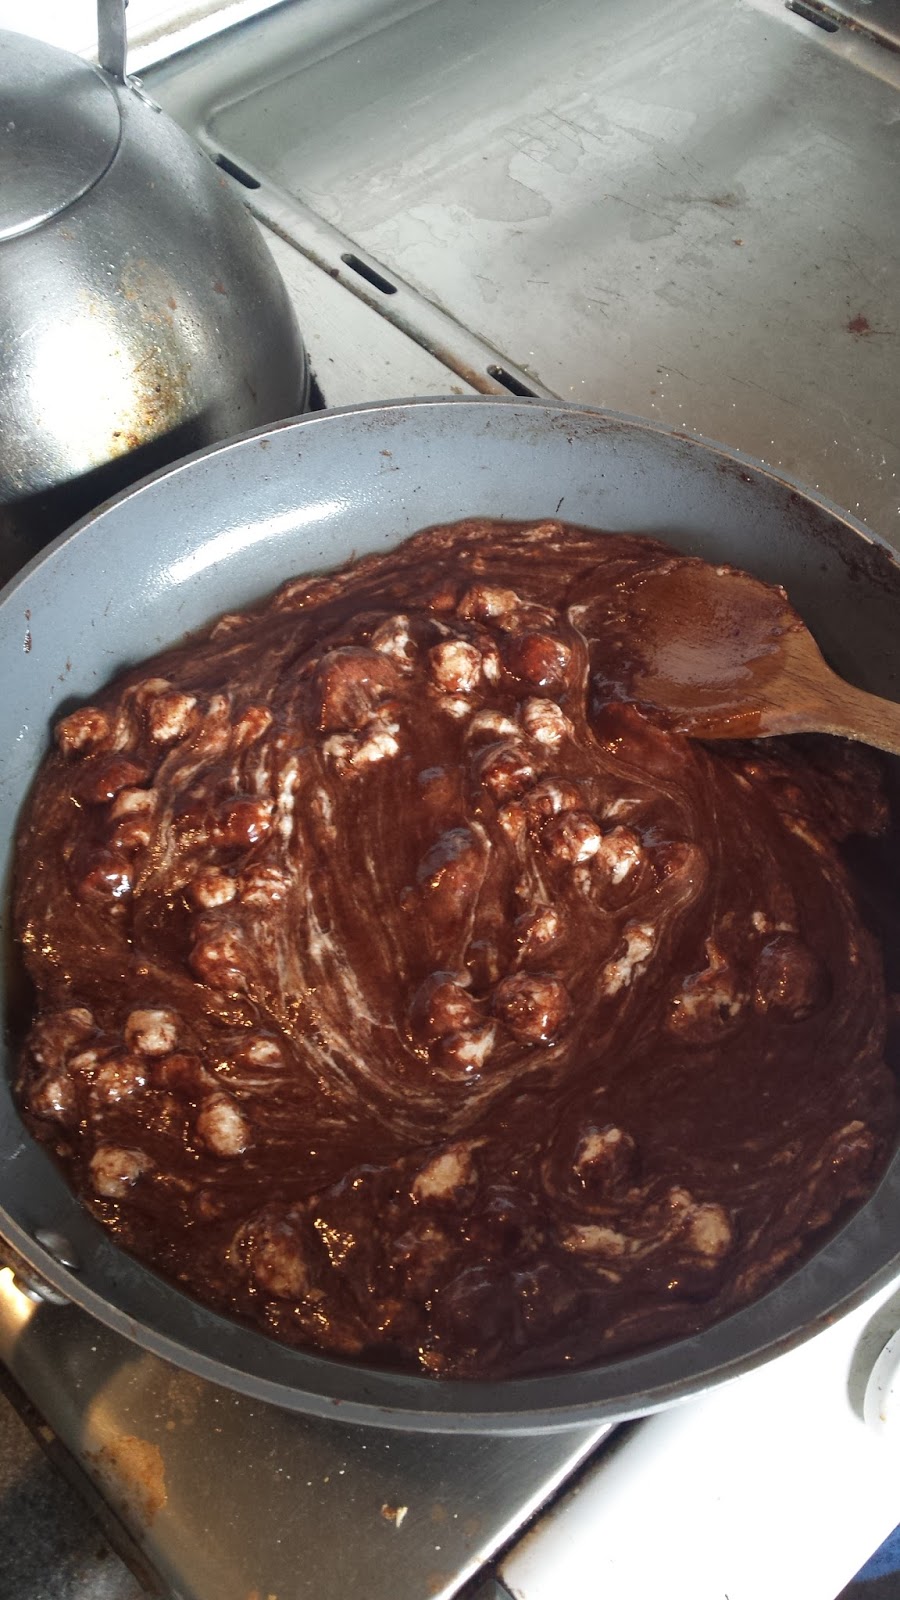
It was actually really simple and considering I am no good with cooking and such, I am definitely in love :) Here are some more pictures to show the process:
After it was completely melted down, I added the rice krispies in and then really quickly, spooned it all into the pan. I put it in the fridge to make sure it set well and I didn't here any complaints, so I am going to assume it came out well :)
![]() |
| Idea |
It was actually really simple and considering I am no good with cooking and such, I am definitely in love :) Here are some more pictures to show the process:
![]() |
| All the supplies |
![]() |
| Adding the chocolate, butter and mini marshmallows |
![]() |
| Almost melted all the way through |
![]() |
| The finished product!!! |
Wednesday, June 17, 2015
Shadowbox Time Capsule
Sorry I have been MIA the past few weeks... I got a full time job assignment with my temp agency and didn't manage to find time to do any crafting or blogging. Anyone who has driven in Southern California knows my pain :(
So the assignment ended and I am here to catch up on some of the crafts that I have left piling up. The one I want to show you today is really quick and simple, but it took a year to make. The idea is brought to you by a friend of mine, Justine at Little Dove Creations, who posted this a while back and I loved it so much that I had to try my hand at it!
It is a Shadowbox Time Capsule!!! How cute is this?!? I always collect all the ticket stubs, pamphlets, wristbands, and pictures from almost everything I go to with my family and what better way to show off those souviners than by putting them on display! Can you imagine a few years down the road, you can make a whole gallery wall with all the shadowboxes :) That's my plan anyways...
I took a stab at it and created my first one last year... I will definitely be doing some tweaking to the future layouts, and might even retroactively go back and do some for the previous years. Heaven knows I have tidbits lying around from things I did back then :) Thanks Justine for the awesome idea...everyone go check out her awesome blog! Have a Happy Hump Day!
So the assignment ended and I am here to catch up on some of the crafts that I have left piling up. The one I want to show you today is really quick and simple, but it took a year to make. The idea is brought to you by a friend of mine, Justine at Little Dove Creations, who posted this a while back and I loved it so much that I had to try my hand at it!
It is a Shadowbox Time Capsule!!! How cute is this?!? I always collect all the ticket stubs, pamphlets, wristbands, and pictures from almost everything I go to with my family and what better way to show off those souviners than by putting them on display! Can you imagine a few years down the road, you can make a whole gallery wall with all the shadowboxes :) That's my plan anyways...
![]() |
| Creation |
I took a stab at it and created my first one last year... I will definitely be doing some tweaking to the future layouts, and might even retroactively go back and do some for the previous years. Heaven knows I have tidbits lying around from things I did back then :) Thanks Justine for the awesome idea...everyone go check out her awesome blog! Have a Happy Hump Day!
Wednesday, April 29, 2015
Coke Tab Hanger
As promised in my last post, I decided to take another idea from the internet and use it as my means of hanging my new Scrabble picture frame. This idea is one that a few of you might have seen (or may have tried yourself) and it only requires three things: a screwdriver, a screw and a Coke tab.
I know this all looks super easy and it probably is, but it seemed to take me forever to try and get mine to stay put! When I popped the tab off of the can, it had a little extra metal at the bottom where you are supposed to screw it to the frame and trying to get it to stay in place while I drilled through the metal and the wood was insane. I am not sure if I would do it again, but so far it seems to be holding up nicely on my wall. Here is my end result:
I would like to think that it looks like the one up above... have any of guys or ladies out there tried this trick? If so, did it work well for you (or should I be waiting for my picture to fall off the wall)? :) Let me know in the comments and as always, even you can fake creativity :)
I know this all looks super easy and it probably is, but it seemed to take me forever to try and get mine to stay put! When I popped the tab off of the can, it had a little extra metal at the bottom where you are supposed to screw it to the frame and trying to get it to stay in place while I drilled through the metal and the wood was insane. I am not sure if I would do it again, but so far it seems to be holding up nicely on my wall. Here is my end result:
Friday, April 24, 2015
Scrabble Hanging
The other day I pulled out my flute and played again for the first time in many months. I have realized that working full-time and caring for a beautiful baby girl doesn't give me much time to express my creativity and I find that I miss it a great deal. I miss putting effort into something other than changing a diaper or writing an email... this blog allows me to put effort into something that is just for me :)
So for today's blog I want to share with you a project that I have been working on for awhile:
No, I wish I could do something as awesome as this by the folks at Remodelaholic, but I scaled mine down a bit and decided to put my Scrabble pieces over a picture. In hind-sight, I could have figured out which picture I wanted first and then make the words in the direction of said photo (i.e. landscape or portrait). But I did it the hard way and went through several versions of the words I wanted to use before finally settling on both the picture and the design of the Scrabble letters.
I went to my local Goodwill store on the hunt for a picture frame and some more Scrabble tiles (we were missing like half the alphabet!). Karma was on my side because not only did I find an awesome colored frame but they had a half-off sale on all their board games!!! I got three boxes of Scrabble for only $5 :)
Note: even though I had all the supplies, inspiration doesn't always strike or it strikes too often and I can't make up my mind. Thus, why I am just now posting this as oppose to about 3 weeks ago when I finished it :( If you are going to replicate this at home, I seriously suggest finding the picture, the pieces and the frame first and then giving yourself some time to put it all together... it was a nightmare trying to keep my toddler's hands away from it.
Once everything was in order, I got to gluing. I had a picture I was going to glue it to but didn't want to damage it, so instead, I put a piece of vellum over the photo and used regular Elmer's glue to stick the pieces on (hot glue might melt the vellum). I used a ruler to keep a straight line across the photo and used weights (i.e. books) to put some pressure on the tiles while they dried.
If you are using a regular frame like mine, and not a shadow box, I recommend putting little spacers between the matting so that there isn't a space between the frame and the matting where the tiles hit the glass. I am super glad that inspiration struck when it did, because it makes a world of difference! Here is the final result:
So for today's blog I want to share with you a project that I have been working on for awhile:
No, I wish I could do something as awesome as this by the folks at Remodelaholic, but I scaled mine down a bit and decided to put my Scrabble pieces over a picture. In hind-sight, I could have figured out which picture I wanted first and then make the words in the direction of said photo (i.e. landscape or portrait). But I did it the hard way and went through several versions of the words I wanted to use before finally settling on both the picture and the design of the Scrabble letters.
I went to my local Goodwill store on the hunt for a picture frame and some more Scrabble tiles (we were missing like half the alphabet!). Karma was on my side because not only did I find an awesome colored frame but they had a half-off sale on all their board games!!! I got three boxes of Scrabble for only $5 :)
![]() |
| Frame |
![]() |
| Pieces |
Once everything was in order, I got to gluing. I had a picture I was going to glue it to but didn't want to damage it, so instead, I put a piece of vellum over the photo and used regular Elmer's glue to stick the pieces on (hot glue might melt the vellum). I used a ruler to keep a straight line across the photo and used weights (i.e. books) to put some pressure on the tiles while they dried.
If you are using a regular frame like mine, and not a shadow box, I recommend putting little spacers between the matting so that there isn't a space between the frame and the matting where the tiles hit the glass. I am super glad that inspiration struck when it did, because it makes a world of difference! Here is the final result:
![]() |
| Creation |
I was very excited for how it turned out and can't wait to try some other Scrabble projects in the future. In the next post I will show you how I hung it on my gallery wall with just a coke tab (another Pinterest idea). Thank you Remodelaholic for the inspiration!
Wednesday, April 8, 2015
Dress it up
I was cleaning/organizing all my pins on Pinterest and I came across this one that I had posted forever ago and thought that since I had all the ingredients (super short list of them!) that I wanted to try it for myself. It originally came from this blog called The Garden Grazer and she totally paired it with this delicious looking southwest cobb salad :)
This looked so good! I didn't make mine with the salad, but instead wanted to use the dressing by itself for veggies or something. So I got all my ingredients together (I listed them below or you can click on the picture for the link to the original website) and just dived right in!
Here is the list of things you need if you want to follow along:
1 cup loosely packed cilantro, stems removed and roughly chopped
1/2 avocado (or 1/2 cup plain vegan yogurt)
2 Tbsp. fresh lime juice (about 1/2 lime), more to taste
1-2 garlic cloves
1/4 cup olive oil
1 1/2 tsp. white wine vinegar
1/8 tsp. salt
Going through the directions was pretty simple and straightforward... there wasn't much for me to mess up, but somehow I did :( I unfortunately put just a little too much lime juice in mine so I had to overcompensate with (and this was my husband's suggestion) sour cream. It actually helped! I also didn't cut up my avocado and pieces of it were getting stuck in the bottom of the blender, so if you don't have rockin' Ninja Bullet, I would highly suggest cutting it in either chunks or slices. I posted some photos below of what it looked like prior to hitting the puree button on the blender:
The only thing that I was a little sad about was it didn't make nearly the amount that I thought it would... but I guess that's a good thing since I messed it up :) I would just make a note that if you are trying this and want to make enough to cover a salad: definitely double the whole recipe. This little container is how much you will get with the directions above. It was totally delicious and definitely worth trying!!! Hope you get a chance to make some of your own... thanks Garden Grazer :)
1 cup loosely packed cilantro, stems removed and roughly chopped
1/2 avocado (or 1/2 cup plain vegan yogurt)
2 Tbsp. fresh lime juice (about 1/2 lime), more to taste
1-2 garlic cloves
1/4 cup olive oil
1 1/2 tsp. white wine vinegar
1/8 tsp. salt
Going through the directions was pretty simple and straightforward... there wasn't much for me to mess up, but somehow I did :( I unfortunately put just a little too much lime juice in mine so I had to overcompensate with (and this was my husband's suggestion) sour cream. It actually helped! I also didn't cut up my avocado and pieces of it were getting stuck in the bottom of the blender, so if you don't have rockin' Ninja Bullet, I would highly suggest cutting it in either chunks or slices. I posted some photos below of what it looked like prior to hitting the puree button on the blender:
![]() |
| Before |
![]() |
| After |
Monday, April 6, 2015
Shine A Light
This post is a short one because there really isn't much to this project. As most of you probably do, I was trolling Pinterest one day and came across this super cute idea using clothespins and recycled tuna fish cans (cleaned of course!)
Super cute and totally easy! Thankfully, my mom actually still uses clothespins and had a bucket full of them in the laundry room. I finally got the cans after remembering not to throw them away after making my Baby A some lunch :)
So there you have it... just a few mins time and you have these super cute holders! I originally was storing miscellaneous items in them to begin with, but after seeing the original post again on Pinterest, I decided to make mine candle holders too :)
Funny side note: my husband found the little tea light candles on the beach yesterday... they were in totally perfect condition and smell like jasmine... mmmm :) Thanks hubby!
Friday, April 3, 2015
Idea into Creation
One of the changes that I am making in my life is trying to get a little more creative about things around me. Sadly, we are living with my parents right now, so there isn't a whole lot of room to branch out and do my own thing most of the time. However, this lack of space (and sometimes privacy) does allow for me to see things in a whole new light and purpose.
You know how the old saying goes: "Recycle, Renew, Reuse"... that's my new mantra. And though I tend to lack in the creativity department (hence the title of my blog), there is luckily an endless supply of other people's ideas out there (thank you Pinterest!!!) that I can use and try to make them my fit for me and my family.
One such idea was taken from an ad in Martha Stewart or BHG or one of those awesome home improvement magazines. I wish I still had the ad, but my Baby A got to it before I could stop her. Anyway, it showed a beautiful metal table with two chairs in this pretty green color in the middle of a forest with leaves all around it... awww. Peaceful right? Well, my table was a little worse for wear and was in desperate need of a makeover, so I figured, "Why not?"
Enter my multi-layered rust spotted table! Not much to look at at first, and even that got uglier once I started using a wire brush on it to take off the who knows how many layers of paint from previous years :( It had seen too many outdoor beatings of rain, wind storms, and general California sun and was in sad shape... but nothing that a can of spray paint couldn't fix :)
The entire time I was scrubbing this thing, I was trying to think of the how I wanted to paint it. I definitely didn't want forest green or silver or anything and as I was rummaging through my parent's collection of spray paint, I happened upon this little beauty from a project a few years ago!
I know it might look green in the photo, but it is actually this super awesome teal color... I was super excited too because it was a full can (which means no running to the store halfway thru the project!) Here are the before and after shots:
I couldn't have been more excited for the end result! Now this once neglected table has new life! Here is a close-up of the details and color on the table top:
The best part about this whole project was it didn't cost me anything except some elbow grease:) Thank you for the idea home improvement magazine!!! I hope this idea-turned-creation helps you look at something different around your house/apartment/thrift store and see the potential in it. Have a great day :D
You know how the old saying goes: "Recycle, Renew, Reuse"... that's my new mantra. And though I tend to lack in the creativity department (hence the title of my blog), there is luckily an endless supply of other people's ideas out there (thank you Pinterest!!!) that I can use and try to make them my fit for me and my family.
One such idea was taken from an ad in Martha Stewart or BHG or one of those awesome home improvement magazines. I wish I still had the ad, but my Baby A got to it before I could stop her. Anyway, it showed a beautiful metal table with two chairs in this pretty green color in the middle of a forest with leaves all around it... awww. Peaceful right? Well, my table was a little worse for wear and was in desperate need of a makeover, so I figured, "Why not?"
Enter my multi-layered rust spotted table! Not much to look at at first, and even that got uglier once I started using a wire brush on it to take off the who knows how many layers of paint from previous years :( It had seen too many outdoor beatings of rain, wind storms, and general California sun and was in sad shape... but nothing that a can of spray paint couldn't fix :)
![]() |
| Ready for it's paint job! |
![]() |
| Here goes nothing! |
![]() |
| Before |
![]() |
| After |
![]() |
| SO PRETTY!!! |
Subscribe to:
Posts (Atom)